How to uninstall Internet Explorer (IE) 10

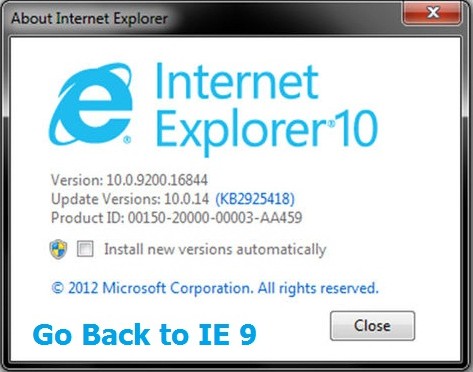
If you aren’t happy with Internet Explorer 10 and want to uninstall or delete IE 10 version from your Windows PC then you should follow the steps given here.

When you install the windows 7, 8 PC the default version of the internet explorer installed along with the windows. However, when your windows get updated with the server on the Windows, your internet explorer version changes and it’s become IE10. However, most of the people love to use internet explorer default version instead of the third party browsers. However, due to the updating of the window the default internet explorer converts into 10 versions.

remove internet explorer 10

Check : Fix Bootmgr missed Error

Most of the people are complaining that IE10 has so many bugs and want to remove that but they do not know the process to uninstall the IE10 and they don’t even try to find that.  We have easy to follow and simplest steps given here.

How to remove Internet Explorer 10 from Windows

please follow my comprehensive guide given to get proven solution for IE related errors.

  1. Press the window button from the keyboard or click on the start button from the windows menu.
  2. Type “programs and features” in the search of start button
  3. Click on the option of “programs and features”, a window will open in front of you, from where you can uninstall other third party software’s.
  4. Then find out the option of “view installed updates” option in the whole window of “programs and features”.
  5. Click on the option of “view installed updates” and select the IE10 updates and click on the option of uninstall a program.
  6. However, shortly the IE10 updates will remove from the windows and your explorer converts into the old version again.

Through the above process, you can uninstall the IE10. Mostly people do not use the internet explorer because there are several reasons for not to using this browser. Some of them get Registry errors and while other get error like DNS server not responding. Here are the lists of those problems those internet explorer keeps due to which people avoid using it.

  1. The first and basic problem of this browser is that, it is too much heavy and whenever you open it, along with this browser so many toolbars open.
  2. It takes a lot of time to open any website and shows many security errors whiling opening the website.
  3. A developer cannot remove the bugs of the website by using this browser because it is not compatible with programming testing.
  4. The format of the version website does not look good on this browser and most of the big website options become disabled on this browser.
  5. Even though you have very fast internet speed, but the process of this browser to open the website is very slow and take a lot of time.
  6. It’s become hang again and again and ask for the different requirement and prompt the massages.

Thus, people try to avoid using this useless browser because it consumes lots of time to proceed the website or any other command. However, it is the only way to install the other browser after doing the new installation of the windows. However, it is not the reliable browser, on which people can relay. Mostly those people use this browse, which uses the intranet application, like banks and other multinational companies.

Relate : What is Windows 7 not Genuine Error?

Congratulation! Now, you know how to get rid of IE 10 and you can successfully delete that from your computer. Please write down your inputs or any error that you are facing during above process. I will be more than happy to assist you.

The Evolution of Rap Videos: From Beginnings to the Modern Age

Rap music, with its intricate lyricism and pulsating beats, has always been more than just auditory entertainment. Its visual counterpart, rap music videos, have undergone a transformative journey mirroring the evolution of the genre itself. From the streets of New York to opulent mansions and exotic locations, rap videos have become a dynamic art form that tells a story beyond the lyrics.

The Humble Beginnings

In the early days of hip-hop, music videos were relatively straightforward. Often set in urban landscapes, these videos were more about showcasing the artist and the community than extravagant storytelling or production. The emphasis was on the lyrics, the beat, and the dance, with simple backgrounds and minimalistic setups.

Rise of Extravagance and Narrative Storytelling

As rap gained traction and started making its mark in mainstream music during the 90s and early 2000s, the videos began reflecting the success and lifestyle associated with it. Big mansions, flashy cars, and luxurious lifestyles became common themes. Additionally, rap videos began to incorporate narrative elements, often telling a story or portraying a message that complemented the song’s lyrics.

Changing Props: From Boomboxes to Drones

The props used in rap videos offer a fascinating insight into their evolution. In the early days, boomboxes, graffiti walls, and street dance formed the core visual elements. As the genre progressed, the props became more elaborate. Expensive cars, champagne bottles, mini bongs and designer outfits started making frequent appearances. In the modern age, technology plays a significant role. Drones capture sweeping aerial shots, and advanced graphics and animations enhance the visual storytelling. Even the bling has evolved – from simple gold chains to intricate diamond-studded pieces symbolizing status and success.

Embracing Diversity and Cultural Elements

Modern rap videos often incorporate diverse cultural elements, reflecting the global influence of the genre. From traditional African dances to Asian aesthetics, these videos have become a melting pot of cultures. This multicultural approach not only showcases the artist’s influences and background but also resonates with a global audience.

Social Commentary and Authenticity

Today’s rap artists are unafraid to use their platform to comment on social and political issues. Videos often address topics like racial inequality, police brutality, and mental health. This shift towards authenticity and raw storytelling makes rap videos more than just entertainment – they are a powerful medium for change.

Data Speaks: Evolution in Rap Video Budgets


Era Average Budget (in $) Notable High Budget Videos
Late 80s 50,000 “My Philosophy” by KRS-One
Mid 90s 500,000 “California Love” by Tupac
Early 2000s 1,500,000 “Victory” by Puff Daddy
2010s-Present 2,000,000 “Sicko Mode” by Travis Scott

Note: These are approximate figures and can vary based on individual artists and production choices.

This table showcases the exponential growth in rap video budgets over the years, indicating the genre’s increasing commercial success and the importance of visuals in the overall package.

Conclusion

Rap music videos have come a long way from their simple beginnings. As the genre continues to evolve, so does its visual representation, reflecting the changing times, values, and aesthetics. The modern rap video is a testament to the genre’s impact, influence, and unyielding relevance in the music industry.

How to recall an email in outlook 2010, 2013, and 2007

Recalling an email is one of best feature provided in outlook express. If you are using outlook 2013, 2010 or 2007 version in your Windows 7 or 8 PC and want this advance feature to be enabled then you should checkout the detailed steps given in this page.

When you are working in a professional environment, then it is very important to send the proper email to your co-worker or other office employer because in the professional environment people consider or justify your skills. Therefore, you have to be very conscious to do the work with your senior or junior staff. You are using your gmail id and don’t know which gmail setting would be required, please checkout my previous post about same.

recall email for outlook 2013, 2007 and 2010

Mostly this happens in outlook, while typing the email you forgot to attach any document that was very important to attach with that email. Some you have also made some mistakes in that email. However, this is the problem for that person who does not know about the features of the outlook. However, outlook provides the feature of recall the email, makes the changes in the email, and again sends to the person. However, these changes will be made in that email. It is the amazing feature of outlook, which most of the people do not know about it, however, below are the simple steps that will let you know, how to use this feature in outlook 2010, 2013 and 2007 to make your professional life easier.

Related : Steps to root Samsung Galaxy S3

Process of recall in outlook 2013

  1. If you have sent the email through outlook 2013, then you recall the email like this, client on the ribbon file and see the option of “info”
  2. Click on the option of “info” you will find the option of recall there.
  3. Click on the button of “resend or recall” button and select the option of “recall this message”
  4. Then make the changes in the email and send that email to the person to whom you want to send.

If you face any error then you should double check your setting. Sometime other configuration may clash with this feature.

How to recall an email in outlook express 2010

  1. If you have sent the email by using outlook 2010 and now you have to resend or recall the email to the client or co-worker, then click on the option of “file” from the ribbon.
  2. Find the option of “info” in the File drop down, once you find out the “info” button select the “resend or recall button”.
  3. Resend this message to the client by doing editing in the email. It is the simple process to recall the email via 2010.

Recalling process in outlook 2007

In the outlook 2007, the process of recall the message is a little bit different because the interface of the outlook is little bit change from the other version of outlook. The process of recalling is below.

  1.  Click on the “message tab” in the ribbon of the outlook and find out the option of “other Actions”
  2. Once you find out the option of “other Actions” open the drop down of “recall this message”
  3. Edit the message and recall or resend to your client.

See also : Get more followers on Instagram

Congratulation! You have successfully set your email client, so now you can send your emails without any error and no attachment issue. Please share your experience by commenting here.

How to fix bootmgr is missing error in Windows 7 / 8 PC

In my last tutorial, I wrote about proven method to resolve Windows 7 not Genuine Error and now it’s time to help you out with missing Bootmgr related error.

The bootloader is used to boot from VHD, which understands VHD files. The version in Windows Vista doesn’t understand VHD files and so it cannot be boot into VHD files. To solve the issue, we need to get the bootloader from Windows 7. Now, we need to boot into a windows 7 machine.

fixing error of bootmgr is missing

You can also download Windows 7 Beta 7000 and can use the bootloader. We need 2 files; The fist is BootMgr and second is BCDEdit.exe. Bootmgr is Windows boot sequence operator which was first introduced in Windows Vista. It reads boot configuration data and then displays the selection menu of the operating system.

Causes for “Bootmgr is missing”:

There are many causes for bootmger errors. One of the reasons for this error is misconfigured and corrupted files, operating system issues, hard drive, corrupt hard drive area, loose or damaged hard drive cable and outdated BIOS. Another reason might be that the PC is trying to boot itself from a flash drive or hard drive, which is not authorized to be booted from. If you try to boot the PC from a non-bootable source like floppy drive and optical drive then it is bound to show this error. You should keep all these point in mind to avoid such error in future.

Related : How to restore deleted files on windows 8 and 7 PC

How to resolve the Bootmgr is missing” error

  1. You may restart the PC. The “Bootmgr not found” error might be a fluke.
  2. Check whether your PC is trying to boot from a non-bootable source like floppy disk or external drive. While in this case then you have to change the boot order from the BIOS setting.
  3. Make sure from the BIOS setting that the first booting is from the hard drive or any other bootable source, if you have two or more hard drives. If you fail to do so then the “Bootmgr is missing” error will occur.
  4. Check for fault power cables and internal data. If you see that the interface cables are defected that you should change the SATA or PATA cable. Loose or faulty cable may lead to “Bootmgr is missing” error.
  5.  Perform Startup repair of the operating system. This process will help you to replace any corrupt or missing files, including BOOTMRG.
  6. To correct any configuration, corruption or other problem you may write new partition boot sector in the Windows system partition.
  7. Rebuild BCD or the Boot Configuration Data. Similar to the previous problem, an incorrect configured or corrupted BCD can cause “Bootmgr is missing”.
  8. Make sure to check the hard drive and other setting in BIOS that they are correct or not. Incorrect BIOS setting can also be the problem of “Bootmgr is missing” error. If you are not sure what is the correct setting of BIOS then opt for the auto setting, which will automatically configure the BIOS setting.
  9. You should have an updated motherboard’s BIOS or else an outdated version of BIOS may cause “Bootmgr is missing” error.
  10. If all else fails then replace the hard drive and install new Windows.

Congratulation! You have successfully fixed the BootMgr related error and now you are free to use your computer. In case above Windows error fixture doesn’t work for you then you can contact us by commenting here.  Please provide in depth idea about what kind of error you are facing and what have you done to try to resolve that, so that we don’t look into that area and it ultimately save both of us time.

How to Fix / repair registry errors in Windows 7 and 8 PC

Registry errors are common in Windows 7 and 8 PCs when you play with corrupt software. You must have to repair or fix the registry file in order to get rid of that error. In my earlier tutorial, I gave you step by step guide to resolve dns server not responding error and now we are here with another workaround for your Windows PC.

Backing up your registry is an essential thing to do in an operating system. Many times you get the error message that the system is not registered. The computer acts strangely, shows weird error messages (i.e Windows 7 is not Genuine error, etc ) and some features disabled are the signs of an unregistered computer or corrupted computer. Bad software downloaded from a corrupt site or installed from a corrupt source can mess with the computer settings.

repair and fix windows 7 / 8 registry errors

Windows Registry operates as a central database for operating system and applications which requires interaction with the core system component and with the utilities while doing any work.

Tips to Fix Registry errors in Windows 7 PC :-

Windows has the option of fixing Windows Registry but often fails to restore the previous registry keys, this increase the difficulty level for the user to manually search and resolve the problem. For this certain reason it is necessary to create backup of Windows Registry, to replace the new registry key with the previous registry key. In Windows 7 however has the option of Windows Registry Repair, which works perfectly and helps you to recover the deleted files back.

You just have to run the Full Scan or Custom Scan option in Windows 7 home premium, professional and enterprise version. You can do the scan manually if you know which part of the computer is corrupted. Once the scan is over the errors will be shown on the main window. You just need to select the errors that you want to remove and disable that program by hitting “Fix Errors” option. The software will automatically clean all the corrupt keys or any other error present in the computer. Once the cleaning process is complete you can optimize the registry with NTRegOpt. It will recreate the registry hive, which will remove the slack space which may be left from the old deleted or modified keys. It also works well on Windows Vista, Windows XP and Windows 7.1.

How to repair registry error in Windows 8 ?

In Windows 8 there is a feature named Automatic Repair which will fix the registry error issues which should solve the problem starting up the Windows. It will automatically scan the settings, system files and configuration options. If it detects any problem in your computer then it will attempt to remove the problems from your computer. You can then get rid of all the registry related issues in your Windows 8.

If your problems are not solved even after this operation then you can all take the option of downloading software that will help you to repair the registry error. One of such software is CCleaner. This software is very easy to use and will help to fix the registry related errors. Another one is the Wise Registry Cleaner. It offers scanning options for you like full scan, custom scan and schedule scan. This process will detect the errors and will solve them for you.

So, These are the two ways in which you can repair or fix  registry errors in your Windows 7 and Windows 8 computer.

How to reset password in windows 7

Many of us struggle to find the password resetting procedure in Windows 7. In our last post we show few easy to execute steps to recover deleted files in PC and now we are giving more tutorial on Microsoft windows operating system.

resetting password of windows 7

It is important to note that resetting password in Windows 7 is not that much of simple process like you do for gmail and other traditional online services. You need to follow pattern of steps in order to perform that action.

How to Change and Reset password in Windows 7?

If you by mistake lost or forgot your password and want to change that then you have to follow the steps given here. You first require Windows repair and driver disk and make sure that computer is not connected with network, otherwise you may not able to perfect these steps accurately.

  1. Insert either Windows 7 system Repair disc or Windows 7 installation DVD, into the optical drive and then reboot the computer. If you choose to do this in a flash drive then you can also go for it.
  2. After the above process, click the Next option on the screen with the help of your keyboard. If you see the Windows 7 logon screen then you have to change the setting and need to boot the computer from the disc that you have inserted.
  3. Click on the “Repair your computer” link. If you use system repair disc then this option will not be visible to you. If you choose otherwise then you can access the link or else got to step 4.
  4. Wait until the Windows 7 installation is located in the computer.
  5. Once it is found take note of drive letter which you will find in the Location column. Mainly it will show D:, but your computer may show otherwise.
  6. Select the Windows 7 option from the list of operating system and click “Next”  button.
  7. Then choose Command Prompt from the System Recovery Option.
  8. After the Command Prompt opens you need to type in the following commands.
    1. copy d:\windows\system32\utilman.exe d:\
    2. copy d:\windows\system32\cmd.exe d:\windows\system32\utilman.exe. If your Windows 7 is not installed in the D drive then make sure to replace the above positions of Ds with the driver name of your computer where your Windows 7 is installed.
  9. Remove the flash drive or the disc from the computer and reboot it.
  10. As soon as Windows 7 login screen appears, select the icon on bottom-left of the windows logon scree which looks like pie.
  11. As soon the Command Prompt is opened, execute net user command “replacingmyusername” with your user name and “mypassword” with the new password that you want to use. For example: net user Sam 1234
  12. Create Windows 7 Password Disk. It is a proactive step that you need to take if in case you forget your password. It is Microsoft-Approved.

If you want to reverse the step then you need to follow the steps from 1 to 7. After accessing the Command Prompt then you need to enter the following command.

copy d:\utilman.exe d:\windows\system32\utilman.exe

Confirm that overwrite is complete and then restart your computer. Undoing the hacking procedure will not affect the new password.

Related :

Whatever you have set your password will be valid, so make sure to enter memorable but still complex pattern, so that nobody can cracked that.

How to fix Windows 7 not Genuine Error

If the Windows 7 installed in your computer is not genuine, then after a few days, a error message pops up in the down right hand corner of the screen telling you that the date has expired and the copy of the Windows is not genuine. Even if you close the message, the message keeps popping up after every few minutes. And this will continue until you fix the problem,or install a genuine version of Windows 7.

This happens because the Windows genuine checker constantly checks whether or not the version installed is a genuine version. This is quite irritable, and in Windows 8 it restricts some of the functions as well. If the computer detects that the version of the Windows 8 installed is not genuine, then it does not allow to set the lock screen picture, and the account picture. Instead it prompts to activate the version of Windows with a key.

fix / resolve windows 7 not genuine error

One of the things that can be done to prevent this from ever happening is to install a genuine version of the Windows you are currently using. By doing this the windows genuine checker would not prompt the message as the version is always genuine. But this method would cost you as the genuine installation DVD or ISO of Windows 7 or 8 comes with a price tag. And not all of the users can afford to have a genuine installation DVD. So for them there are various other ways of getting rid of this problem.

Check : remove and disable Windows 7 startup programs

I would suggest you to buy genuine copy of Windows only. But let say you are student and can’t afford that then you can still buy genuine version, as Microsoft have some student related offers too. Please checkout the official Microsoft Store and you will able to find all the currently working deals.

One of the best solutions is that to activate the version of Windows with a Windows Activator. There are various activators that are available on the internet. But the activators of Windows 7 and Windows 8 computer are different, so do not try to activate Windows 8 or 8.1 with a Windows 7 activator.

  • If you are using a windows activator, simply open the activator as it is an executable file.
  • Then click on the version of the Windows you are using, and then click on Activate.
  • After the process is over, then the computer need to restarted, and the windows that is installed on the computer would be categorized as a genuine version of windows.

But if this technique is too complicated for you, then there are a couple of other simplified techniques.

How to fix Windows 7 not Genuine build 7601 Error

There are three different method for fix the windows not genuine  error. It can be caused by either lack of permission in registry key HKU\S-1-5-20 or windows being used it in trial mode. It can also be happen when some registry keys are missed.

If you are facing problem using missing registry keys, I would suggest you to check Windows Support forum. They have given detailed solution for same.

Method A : Resolve Windows not genuine error by removing file

  • Go to the control panel, and open updates.
  • Find the update named “KB971033″ and uninstall it.
  • Then as always restart the computer.
  • After restarting the problem will be fixed.

Method B : Fix Error using Command Prompt

  • Open the command prompt, and type “SLMGR – REARM”
  • After that just press enter. Then a pop up message will appear telling you that the command was successfully executed, and that the computer needs to be restarted.
  • After restarting the computer, the windows would become genuine, or at least be categorized as such.

It is important to note that, Both method are just workaround. Using Method B you will able to postpone error for 30 days and you can use that for Three times only. So total you can remove  “Windows 7 not Genuine Error” for 90 days only. After that you will need to renew your Windows. Same is the case for method A.

Note from Editor : Method given here are not permanent but it will still help you a lot to test the water and I would suggest you to make good habit of buying such premium OS and software instead of finding hack of that.

GetSpool features iOS Jailbreak, Cydia Apps, Theme Reviews, Tweaks, iPhone, iPad, Apple TV and iPod news.